参考资料
魔改BBR原帖:http://www.hostloc.com/thread-372277-1-2.html
萌新教程: http://www.hostloc.com/thread-372335-1-1.html
只适用于CentOS 6 64位系统 4.12 及以下内核,4.13内核不支持此方法。
手动更新内核
rpm -ivh http://dl1.junlin.li/bbr/kernel-ml-4.12.10-1.el6.elrepo.x86_64.rpm
更新内核完成后修改 /boot/grub/grub.conf 引导文件,修改 default=1 ,把1改成0即可。
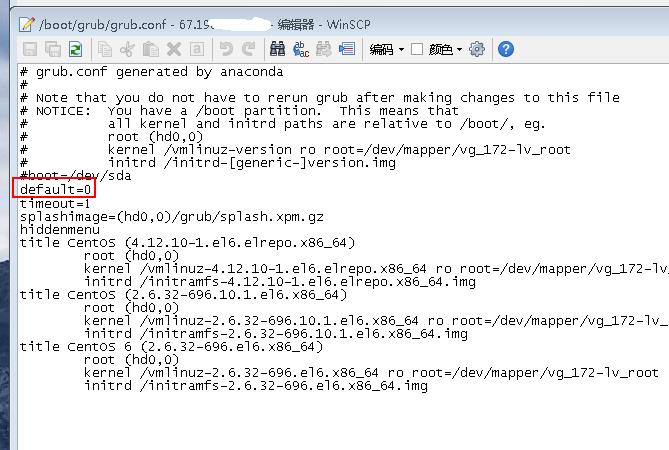
保存并重启 VPS 。
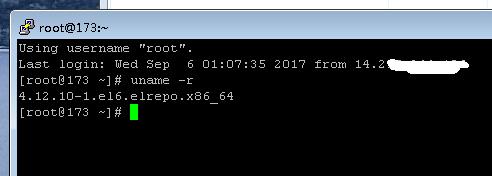
使用命令 uname -r 检查内核是否更新。
以下代码,请逐行执行。
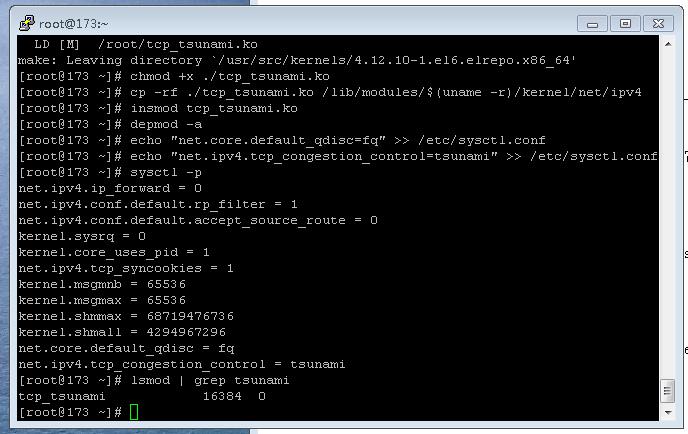
yum remove kernel-headers -y

rpm -ivh http://dl1.junlin.li/bbr/kernel-ml-headers-4.12.10-1.el6.elrepo.x86_64.rpm

rpm -ivh http://dl1.junlin.li/bbr/kernel-ml-devel-4.12.10-1.el6.elrepo.x86_64.rpm

yum install -y make gcc

wget -O ./tcp_tsunami.c https://gist.github.com/anonymous/ba338038e799eafbba173215153a7f3a/raw/55ff1e45c97b46f12261e07ca07633a9922ad55d/tcp_tsunami.c

#备用链接 wget -O ./tcp_tsunami.c http://dl1.junlin.li/bbr/tcp_tsunami.c

echo "obj-m:=tcp_tsunami.o" > Makefile

make -C /lib/modules/$(uname -r)/build M=`pwd` modules CC=/usr/bin/gcc

chmod +x ./tcp_tsunami.ko

cp -rf ./tcp_tsunami.ko /lib/modules/$(uname -r)/kernel/net/ipv4

insmod tcp_tsunami.ko

depmod -a

echo "net.core.default_qdisc=fq" >> /etc/sysctl.conf

echo "net.ipv4.tcp_congestion_control=tsunami" >> /etc/sysctl.conf
运行 sysctl -p 将内核参数生效。
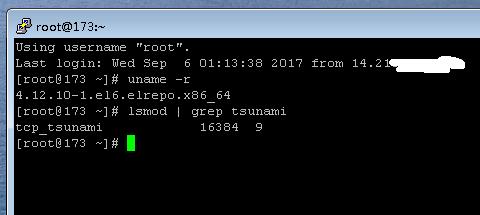
重启 vps 后,执行以下命令。如果有显示内容说明启动成功。
lsmod | grep tsunami